

How to Create a Course in TeachFront (Step-by-Step)
This article is a streamlined companion to the “How to Create a Course in TeachFront” video. The video shows the full click-by-click flow; below is the clean sequence to follow so you can get a new course set up quickly without getting lost in the details.
What you’ll set up (high level)
In TeachFront, a course setup typically has three layers:
- Create the course shell (name, term, dates, join code)
- Configure course settings (payments, appearance, proficiency scales)
- Build the grading structure (objectives → benchmarks → thresholds)
Once those are in place, you’ll be ready to review your syllabus and then move on to assignments (covered in a separate video).
Step 1: Create the course shell
- Click Create course.
- Enter your course name (or course number).
- Select the term.
- Set the start date and end date.
- Create/save the course.
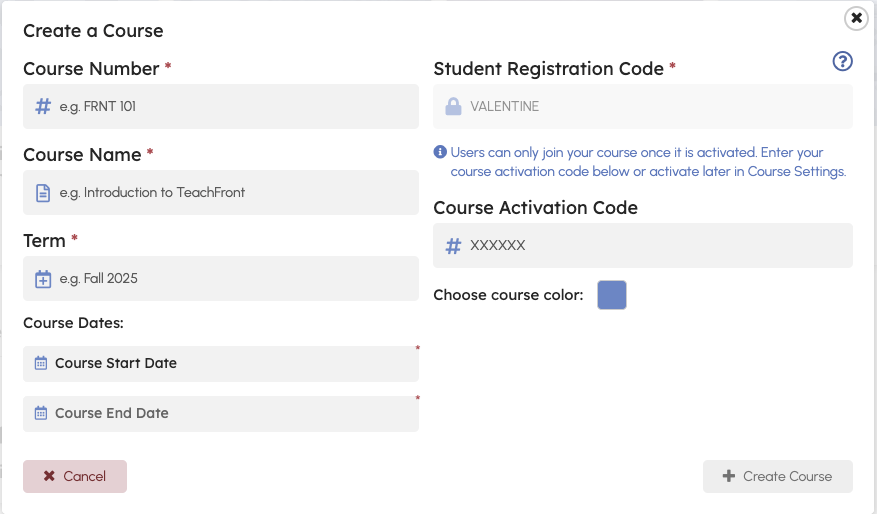
Student registration code
TeachFront generates a course code. This is what students will use to register for your course—keep it handy for your syllabus or welcome email.
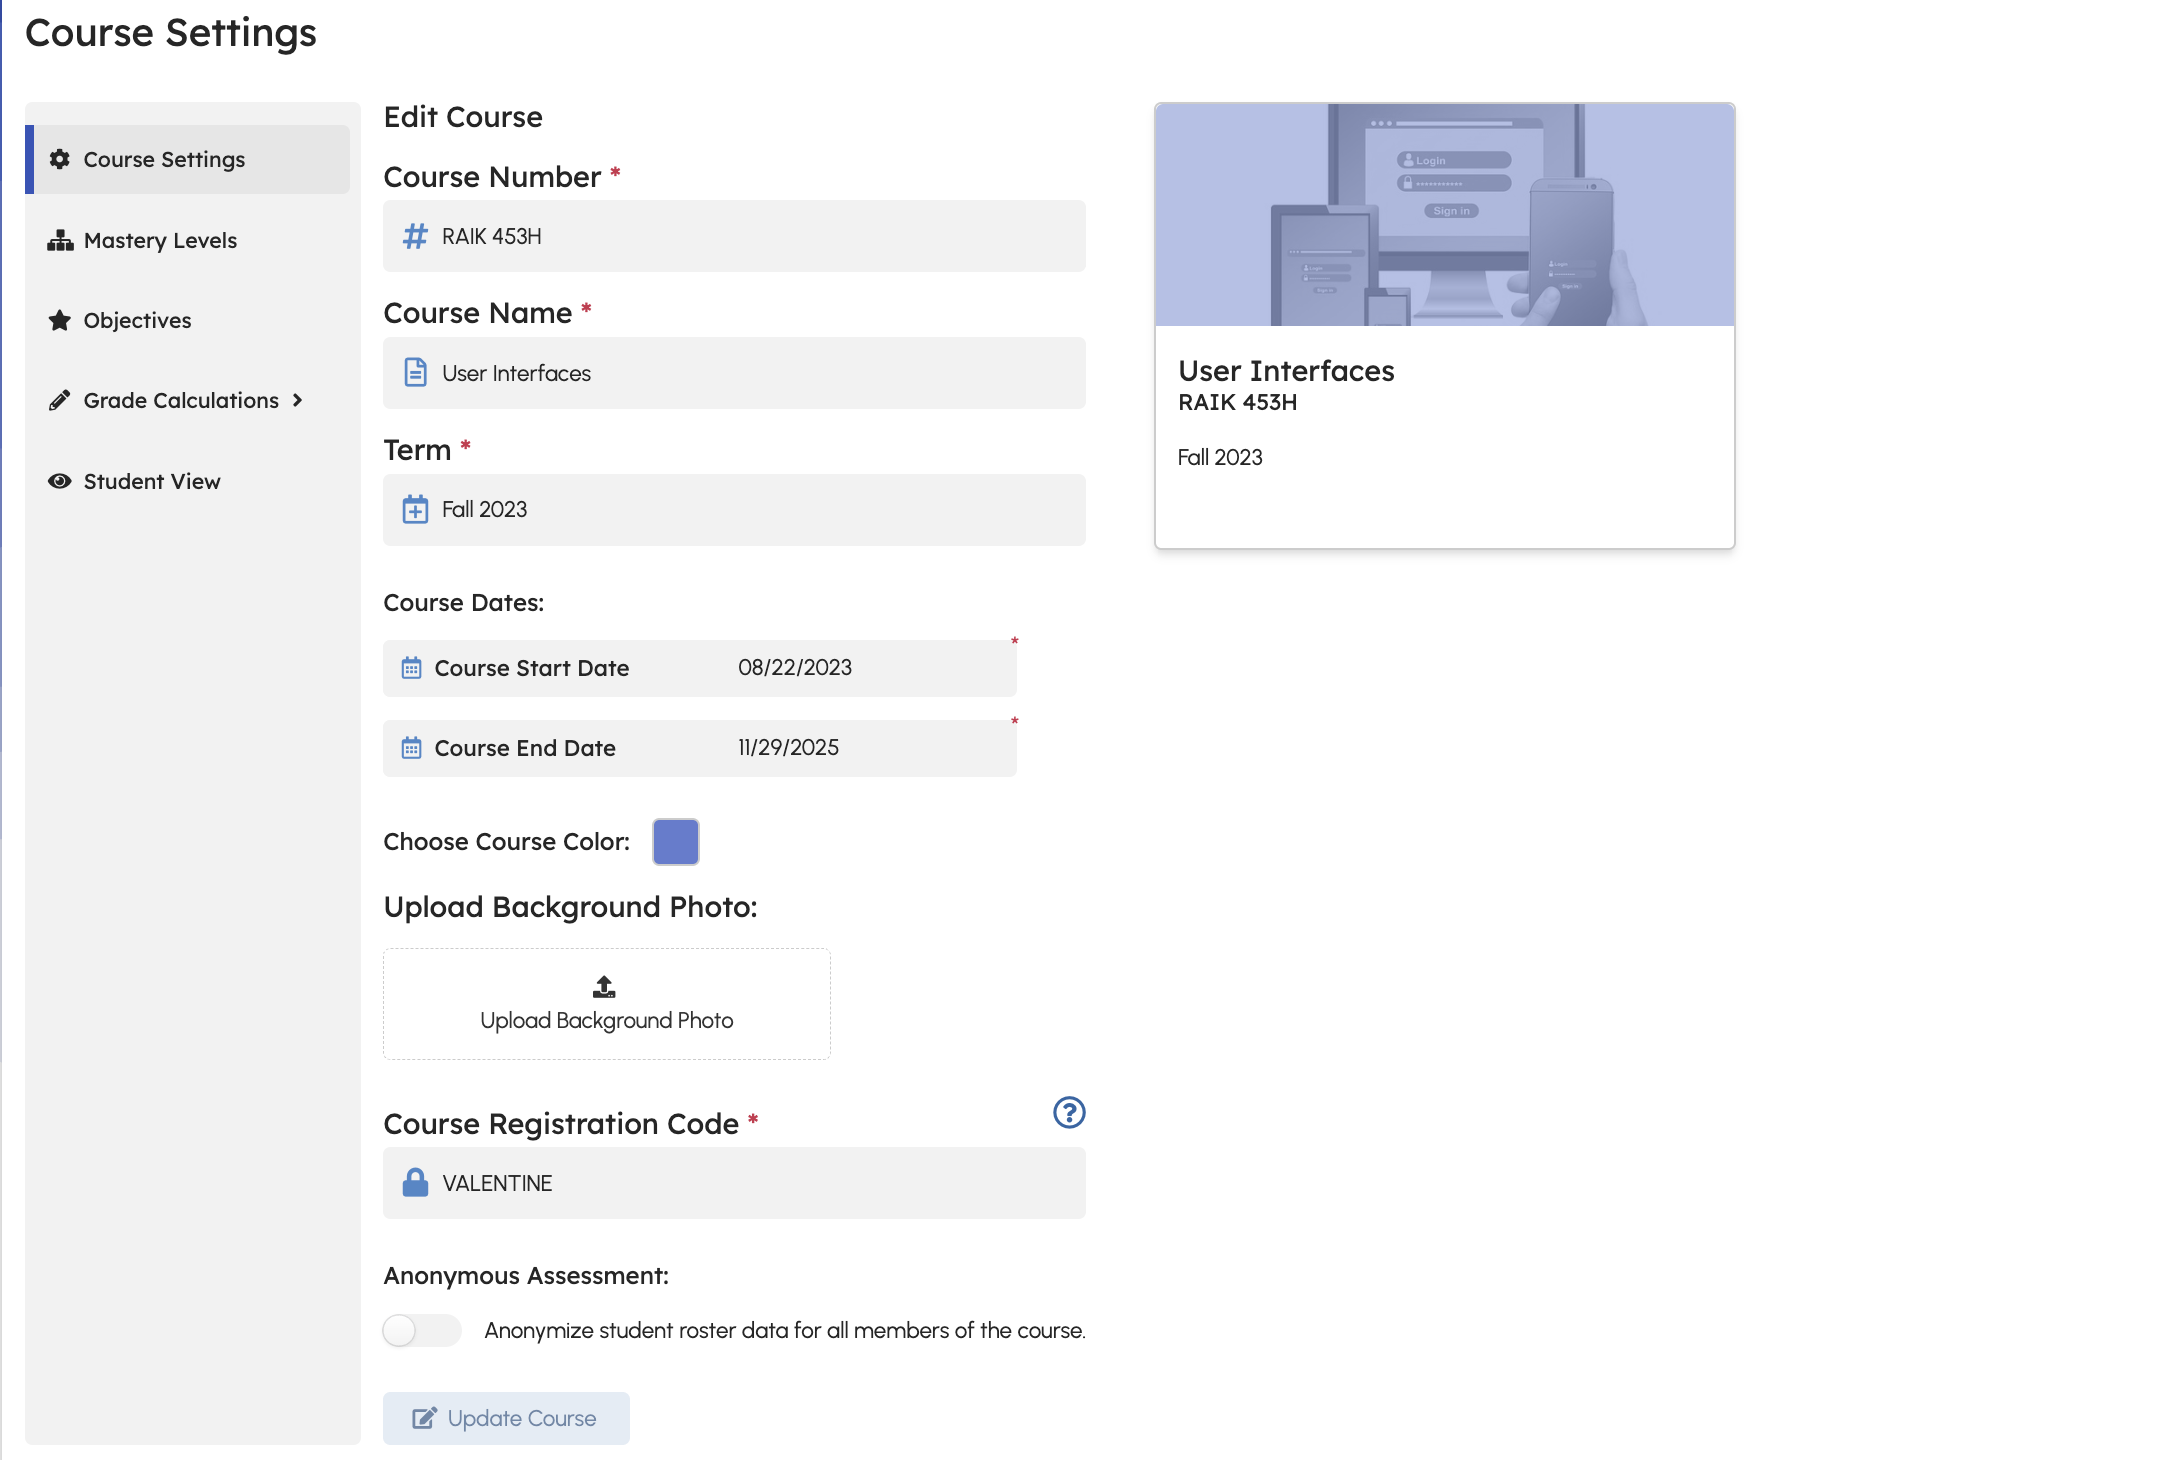
Step 2: Go straight to Settings (before you build anything else)
After creating the course, the first recommended move is to open Settings. A few key choices here make the rest of the course feel “real” and consistent.

2A) Payments: choose how learners/instructors subscribe
- In Settings → Payments, choose how the course will be paid for/subscribed to.
- In the video example, the founder selects Individual payment.
(Your choice here may affect what options appear elsewhere in settings.)
2B) Course settings: choose the look and feel
- Go to Settings → Course settings.
- Choose a course color (the video example uses yellow).
- Optionally upload a background photo.
Step 3: Add proficiency scales
Proficiency level schemes are the rating levels you’ll use when assessing student work (think: the labels on a rubric).
- Go to Settings → Proficiency Scales
- Select a scale to start with.
Recommended starting scheme: Proficiency Triad
In the video, the founder recommends keeping it simple for your first proficiency-based course:
- Use a scheme with one clear “meets proficiency” level
- Include additional levels that indicate:
- Work needed to reach proficiency, or
- Not enough evidence
This reduces complexity while you’re getting comfortable with alternative grading.
Add a second scheme: Effortful Engagement Scale
The video also recommends adding an effort-focused scheme so you can assess completion quality (not just “done vs not done”).
Optional but helpful: allow excused ratings
Enable excused ratings for your schemes so you can handle real-life exceptions (illness, emergencies, etc.) without breaking your grading logic.
Step 4: Create objectives (everything revolves around these)
In alternative grading, objectives are the foundation. You’ll assess student work against objectives, and grades will be calculated from objective ratings.
4A) Create top-level objective groups
A simple structure (shown in the video) is:
- Curriculum (course content proficiency)
- Effortful engagement (how students engage with the work)
For each top-level objective:
- Click to create a new objective.
- Give it a name and (optional) description.
- Choose a color.
- Select the proficiency scale that fits:
- Curriculum → Proficiency Triad
- Effortful engagement → Effortful Engagement Scale
4B) Add sub-objectives under each group
Create sub-objectives that match how you run your course. In the video example, effortful engagement is separated into things like:
- Required readings
- Class participation
- Lab assignments
This keeps ratings organized and makes it easier to see where a student is doing well (or needs support).
Step 5 (Optional but recommended): Set up grade calculations
TeachFront does not require you to complete the grade calculation pages, but the founder notes that doing so makes alternative grading much easier for students to understand.
5A) Add grade distinctions
- Go to Grade distinctions.
- Add the grade labels required by your institution (e.g., A+, A, A-, etc.).
Step 6: Create benchmark groups (how you’ll calculate grades)
Benchmarks define the rules that connect objective ratings to course grades.
6A) Benchmark group 1: Curricular proficiency
- Create a new benchmark group.
- Name it (example: Curricular proficiency).
- Choose the Proficiency Triad proficiency scale.
- Select the Curriculum objectives to include.
- Set a rule like:
- Students must earn at least X% of ratings at Satisfactory (or your proficiency level).
Optional: add a constraint such as limiting how many “not enough evidence/unassessable” ratings are allowed for higher grades.
6B) Benchmark group 2: Effortful engagement
- Create another benchmark group (example: Effortful engagement).
- Choose the Effortful Engagement Scale.
- Select the effort-related objectives.
- Keep the rule simple:
- Students must earn at least X% of ratings that are Complete.
Save your changes.
Step 7: Set grade thresholds (fill in the actual numbers)
Benchmark groups define the type of rule; grade thresholds define the exact values for each grade.
- Go to Grade thresholds.
- For each grade (A+, A, etc.), enter the required thresholds.
In the video example, the founder:
- Sets higher thresholds initially (a bit stricter than expected)
- Tells students they may adjust thresholds later
- Commits to only changing thresholds in students’ favor
Save your preferences.
Step 8: Review your syllabus
With settings, objectives, and grade logic in place, take a look at the syllabus view to confirm the course is represented the way you expect.
Next step: Create assignments
This walkthrough covers course creation and setup. Assignment creation is covered in a separate video.

